As a developer, I want full control over by blog. At the same time I do not want to deal with the implementation details of how to bring content inside my pages.
I have been using Wordpress for a long time. It works, but I always wanted more control over the implementation of my website. When you install a Wordpress plugin, you have generally no idea of how it works, and you also have no control on how to completely customize it for your needs.
What I want is basically some way to implement features like a normal javascript website, while at the same time writing and serving content with ease.
At the core I want to be able to write a text file with support for styling and custom components, save it, and have it available in my blog
Well, there is a solution for that!
- mdx: Allows you to write markdown content and import custom react components
- contentlayer: Allows you to serve local (and remote) content without dealing with implementation details (parsing, caching, incremental updates)
- nextjs: Lets you have full control over the implementation of your website, with top-class performance and an amazing developer experience
In this post we are going to learn how to setup a basic template for a blog using nextjs, contentlayer, and mdx.
After reading this post, you will have a complete blog that can serve local mdx files and that you can fully customize using nextjs.
As always, you can find the final Open Source project on Github:
Create a new NextJs project
We start by creating a new nextjs project. We are going to use typescript, which will make our developer experience much more enjoyable, since it is fully supported by both nextjs and contentlayer.
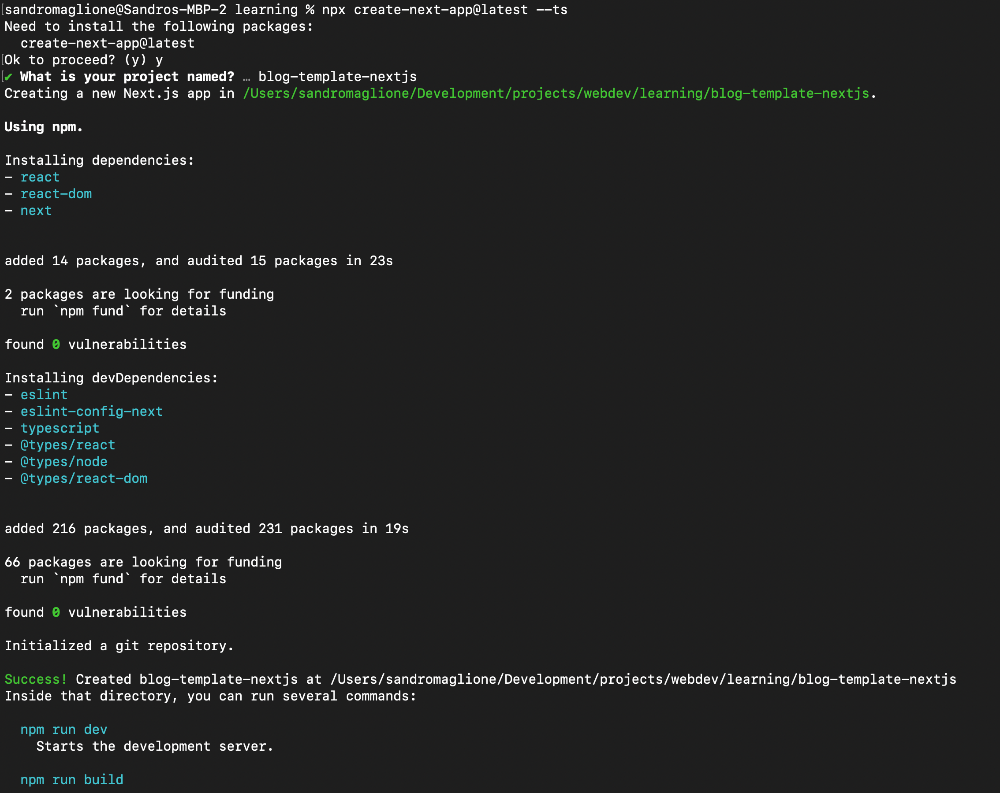
Run the command below to create a brand new nextjs app:
npx create-next-app@latest --ts
We can then clean up the unnecessary files that comes with the initial template of a nextjs project:
- Remove
public/vercel.svg - Remove everything from
styles/global.cssand deletestyles/Home.module.css(we are going to deal with styling later) - Delete
pages/api/hello.ts - Remove the initial content from
pages/index.tsx
Now we are ready to bring contentlayer in our app.
Content Layer
contentlayer comes with an official binding with nextjs called next-contentlayer that will make the setup a lot easier.
We are going to install both contentlayer and next-contentlayer:
npm install contentlayer next-contentlayerThe first step is importing and using contentlayer in our nextjs configuration file.
Import and add contentlayer in next.config.mjs (change the extension to mjs to support importing modules):
import { withContentlayer } from "next-contentlayer";

/** @type {import('next').NextConfig} */
export default withContentlayer({
  reactStrictMode: true,
});
The second step is to configure typescript to recognize the files and types generated by contentlayer.
We need to update tsconfig.json:
- Specify the path of the content generated by
contentlayerthat we are going to import in our project (contentlayer/generated) - Include the contentlayer folder inside the types of our project (
.contentlayer/generated)
{
  "compilerOptions": {
    "target": "es5",
    "lib": ["dom", "dom.iterable", "esnext"],
    "allowJs": true,
    "skipLibCheck": true,
    "strict": true,
    "forceConsistentCasingInFileNames": true,
    "noEmit": true,
    "esModuleInterop": true,
    "module": "esnext",
    "moduleResolution": "node",
    "resolveJsonModule": true,
    "isolatedModules": true,
    "jsx": "preserve",
    "incremental": true,
    "baseUrl": ".",
    "paths": {
      "contentlayer/generated": ["./.contentlayer/generated"]
    }
  },
  "include": [
    "next-env.d.ts",
    "**/*.ts",
    "**/*.tsx",
    ".contentlayer/generated"
  ],
  "exclude": ["node_modules"]
}
Content configuration
contentlayer allows you to specify the source path of all your local content.
Furthermore, contentlayer allows you to define the shape of your frontmatter. This configuration allows contentlayer to add complete type-safety over your content. In fact, contentlayer is going to verify the structure of your posts and generate typescript types accordingly.
Create a file called contentlayer.config.ts in root directory of the project with following content:
import { defineDocumentType, makeSource } from "contentlayer/source-files";

export const Post = defineDocumentType(() => ({
  name: "Post",
  filePathPattern: `**/*.mdx`, // Type of file to parse (every mdx in all subfolders)
  contentType: 'mdx',
  fields: {
    title: {
      type: "string",
      description: "The title of the post",
      required: true,
    },
    date: {
      type: "date",
      description: "The date of the post",
      required: true,
    },
  },
  computedFields: {
    url: {
      type: "string",
      resolve: (post) => `/posts/${post._raw.flattenedPath}`,
    },
  },
}));

export default makeSource({
  contentDirPath: "data", // Source directory where the content is located
  documentTypes: [Post],
});
We define one document type called Post (you can define more than one document type if you want):
- Using
filePathPatternwe specify the type of files thatcontentlayerwill serve fieldsis the required shape of ourfrontmattercomputedFieldsare extra parameters that are computed fromfields. In this case we access the autogenerated_raw.flattenedPathvalue to create a unique URL for each post
We defined
contentTypeasmdx. This will tellcontentlayerto generate the parsed code frommdxthat we can use inside our component
Finally, we define the directory that will contain our files using contentDirPath. We then create such data folder in root directory of our project, which will contain the mdx content to parse.
Create content
All the content goes inside the data folder. contentlayer takes all mdx files, parses them, and makes them available inside nextjs.
We can just create a mdx file inside data:
---
title: Lorem Ipsum
date: 2021-12-24
---

Ullamco et nostrud magna commodo nostrud occaecat quis pariatur id ipsum. Ipsum
consequat enim id excepteur consequat nostrud esse esse fugiat dolore.
Reprehenderit occaecat exercitation non cupidatat in eiusmod laborum ex eu
fugiat aute culpa pariatur. Irure elit proident consequat veniam minim ipsum ex
pariatur.

Mollit nisi cillum exercitation minim officia velit laborum non Lorem
adipisicing dolore. Labore commodo consectetur commodo velit adipisicing irure
dolore dolor reprehenderit aliquip. Reprehenderit cillum mollit eiusmod
excepteur elit ipsum aute pariatur in. Cupidatat ex culpa velit culpa ad non
labore exercitation irure laborum.
Inside the first 4 lines we define the
frontmatterof the post. The information should match the one we specified insidefieldsin ourcontentlayerconfiguration, otherwisecontentlayerwill report an error and not generate the page
We are ready to generate our content! With this configuration, contentlayer will generate our content when we run or build our nextjs app. It will also automatically listen for changes in every file and cache everything for us, which will make writing content easy and fast.
We can now run our nextjs app to generate the content:
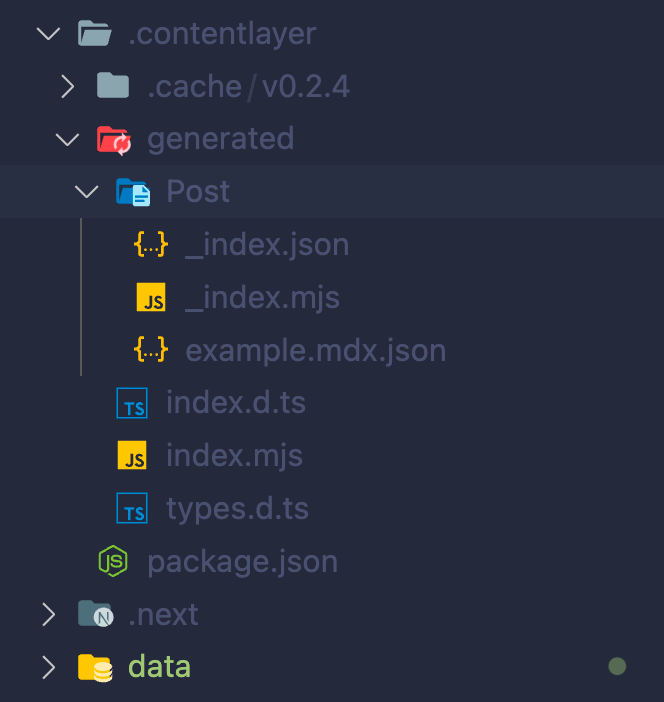
npm run devAfter running this command contentlayer will generate a .contentlayer folder that contains the parsed files:

The content of the file is stored in json format, which contains all the fields and computedFields we specified, as well as body (raw and code), _id, and _raw that are autogenerated by contentlayer.
The
codeparameter is present since we defined thecontentTypeasmdx, otherwise we would have anhtmlfield instead ofcode
{
  "title": "Lorem Ipsum",
  "date": "2021-12-24T00:00:00.000Z",
  "body": {
    "raw": "\nUllamco et nostrud magna commodo nostrud occaecat quis pariatur id ipsum. Ipsum\nconsequat enim id excepteur consequat nostrud esse esse fugiat dolore.\nReprehenderit occaecat exercitation non cupidatat in eiusmod laborum ex eu\nfugiat aute culpa pariatur. Irure elit proident consequat veniam minim ipsum ex\npariatur.\n\nMollit nisi cillum exercitation minim officia velit laborum non Lorem\nadipisicing dolore. Labore commodo consectetur commodo velit adipisicing irure\ndolore dolor reprehenderit aliquip. Reprehenderit cillum mollit eiusmod\nexcepteur elit ipsum aute pariatur in. Cupidatat ex culpa velit culpa ad non\nlabore exercitation irure laborum.",
    "code": "var Component=(()=>{var m=Object.create;var a=Object.defineProperty;var l=Object.getOwnPropertyDescriptor;var p=Object.getOwnPropertyNames;var d=Object.getPrototypeOf,x=Object.prototype.hasOwnProperty;var f=(e,t)=>()=>(t||e((t={exports:{}}).exports,t),t.exports),g=(e,t)=>{for(var i in t)a(e,i,{get:t[i],enumerable:!0})},u=(e,t,i,o)=>{if(t&&typeof t==\"object\"||typeof t==\"function\")for(let r of p(t))!x.call(e,r)&&r!==i&&a(e,r,{get:()=>t[r],enumerable:!(o=l(t,r))||o.enumerable});return e};var b=(e,t,i)=>(i=e!=null?m(d(e)):{},u(t||!e||!e.__esModule?a(i,\"default\",{value:e,enumerable:!0}):i,e)),h=e=>u(a({},\"__esModule\",{value:!0}),e);var s=f((M,c)=>{c.exports=_jsx_runtime});var v={};g(v,{default:()=>q,frontmatter:()=>j});var n=b(s()),j={title:\"Lorem Ipsum\",date:new Date(1640304e6)};function _(e={}){let{wrapper:t}=e.components||{};return t?(0,n.jsx)(t,Object.assign({},e,{children:(0,n.jsx)(i,{})})):i();function i(){let o=Object.assign({p:\"p\"},e.components);return(0,n.jsxs)(n.Fragment,{children:[(0,n.jsx)(o.p,{children:`Ullamco et nostrud magna commodo nostrud occaecat quis pariatur id ipsum. Ipsum\nconsequat enim id excepteur consequat nostrud esse esse fugiat dolore.\nReprehenderit occaecat exercitation non cupidatat in eiusmod laborum ex eu\nfugiat aute culpa pariatur. Irure elit proident consequat veniam minim ipsum ex\npariatur.`}),`\n`,(0,n.jsx)(o.p,{children:`Mollit nisi cillum exercitation minim officia velit laborum non Lorem\nadipisicing dolore. Labore commodo consectetur commodo velit adipisicing irure\ndolore dolor reprehenderit aliquip. Reprehenderit cillum mollit eiusmod\nexcepteur elit ipsum aute pariatur in. Cupidatat ex culpa velit culpa ad non\nlabore exercitation irure laborum.`})]})}}var q=_;return h(v);})();\n;return Component;"
  },
  "_id": "example.mdx",
  "_raw": {
    "sourceFilePath": "example.mdx",
    "sourceFileName": "example.mdx",
    "sourceFileDir": ".",
    "contentType": "mdx",
    "flattenedPath": "example"
  },
  "type": "Post",
  "url": "/posts/example"
}
As you can see,
flattenedPathis used to generate theslugof our post from the file name
There is more 🤩
Every week I dive headfirst into a topic, uncovering every hidden nook and shadow, to deliver you the most interesting insights
Not convinced? Well, let me tell you more about it
List all posts
We are basically done with our contentlayer configuration.
Now we can just import our content as data inside our nextjs app.
We start by adding a list of all the posts in index.tsx. Inside contentlayer/generated we have all the content and types that we can simply import using typescript.
We take advantage of getStaticProps to extract and pass all the posts as props to our page.
Inside pages/index.tsx add the following content:
import { allPosts, Post } from "contentlayer/generated";
import type {
  GetStaticPropsResult,
  InferGetStaticPropsType,
  NextPage,
} from "next";
import Head from "next/head";
import Link from "next/link";

export async function getStaticProps(): Promise<
  GetStaticPropsResult<{ posts: Post[] }>
> {
  return { props: { posts: allPosts } };
}

const Home: NextPage<InferGetStaticPropsType<typeof getStaticProps>> = ({
  posts,
}) => {
  return (
    <div>
      <Head>
        <title>NextJs Content Layer Blog Template</title>
      </Head>

      {posts.map((post, idx) => (
        <div key={idx}>
          <Link href={post.url}>
            <a>{post.title}</a>
          </Link>
        </div>
      ))}
    </div>
  );
};

export default Home;
As you can see, we imported the content and types generated by contentlayer from contentlayer/generated. We then pass all the posts using nextjs getStaticProps (which will pre-render this page at build time with our local posts).
We can then access the list of posts as props in the page and display a list of them, with links to each single page (which we still need to create).
This code is also completely typesafe using
InferGetStaticPropsTypefromnextjsand thePosttype generated bycontentlayer

Pages for single posts
Finally, the last step is creating a page that will display each blog post.
Inside pages we create a posts folder and inside it a [slug].tsx file. Adding brackets to a nextjs page allows us to get the path parameter inside getStaticProps.
We therefore get the slug parameter, search for a post that matches the slug as url, and when found we pass the Post as props to the page, which containing the data of the post.
We also take advantage of getStaticPaths to define a list of paths from our post to be statically generated.
In order to display our code as a component inside the page we use the useMDXComponent provided by contentlayer.
import { allPosts, Post } from "contentlayer/generated";
import {
  GetStaticPathsResult,
  GetStaticPropsContext,
  GetStaticPropsResult,
  InferGetStaticPropsType,
  NextPage,
} from "next";
import { useMDXComponent } from "next-contentlayer/hooks";
import Head from "next/head";
import Link from "next/link";

// Generate static paths for all posts
export async function getStaticPaths(): Promise<GetStaticPathsResult> {
  const paths = allPosts.map((post) => post.url);
  return {
    paths,
    fallback: false,
  };
}

// Find post with matching slug and return it as props to the page
export async function getStaticProps({
  params,
}: GetStaticPropsContext): Promise<GetStaticPropsResult<{ post: Post }>> {
  const post = allPosts.find(
    (post) => post._raw.flattenedPath === params?.slug
  );

  // Redirect to homepage if post not found
  return typeof post === "undefined"
    ? {
        redirect: {
          destination: "/",
          permanent: false,
        },
      }
    : {
        props: {
          post,
        },
      };
}

const PostLayout: NextPage<InferGetStaticPropsType<typeof getStaticProps>> = ({
  post,
}) => {
  // Get MDX component for post
  const Component = useMDXComponent(post.body.code);
  return (
    <>
      <Head>
        <title>{post.title}</title>
      </Head>

      <article>
        {/* Link back to homepage */}
        <div>
          <Link href="/">
            <a>Home</a>
          </Link>
        </div>

        {/* Display parsed markdown content */}
        <div>
          <h1>{post.title}</h1>
          <time dateTime={post.date}>{post.date}</time>
        </div>

        <Component />
      </article>
    </>
  );
};

export default PostLayout;
That's all. You now have a blog that serves local file and that you can completely customize.
You can see the potential of this project. We can add many more features starting from this basic configuration. Stay tuned for the next posts because I am going to add more functionalities like:
- Sitemap
- Styling
- Private posts
- Analytics
- SEO optimization
